Table of Contents
- Instructions PDF
- Step C: Taking the Main Arm Out of the Box
- Step D: Assembling the Clamp
- Step E: Attaching the Legs to the Main Arm
- Step F: Attaching the Legs to the Clamp
- Step G.1: Prep Foam to Hold Screen For Attaching
- Step G.2: Attach a Wacom Cintiq Pro 24 to the XOOT_Pro Arm
- Step G.2: Attach a Wacom Cintiq Pro 32 to the XOOT_Pro Arm
- Step G.2a: (Optional) Modify Cintiq 27 QHD Cover Plate
- Step G.2: Attach a Wacom Cintiq 27 QHD to the XOOT_Pro Arm
- Step L: Attach a Screen to the MT11 Kit of the XOOT_Pro Arm
- Step L: Attach a Wacom Cintiq Pro 27 to the XOOT_Pro Arm
- Step L: Attach a Dell Canvas 27 to the XOOT_Pro Arm
- Step L: Attach a XPpen Artist Pro 27 (Gen2) to the XOOT_Pro Arm
- Step H: Stowing Cables and Attaching Covers
- Step I.1: Attaching the Touch Strips to your Screen
- Step I.2: A Quick Test of the XOOT_Pro Brake System
- Step J: Adjusting the Rotation Friction
- Step K: Attaching the Folding Feet to Screen (Optional)
- Step M: Attaching Pre-Stress pads to an MT11 Kit (Optional)
- Step N: Attaching Weights to MT11 Kit (Optional)
- Installing Spacers to change Screen Height
- Fixing a Screen Stuck At the Wrong Angle
- Troubleshooting arm making a popping noise
- Installing a New Cable
- Repack a XOOT_Pro (how everything goes back in the box)
- Install a New Cable
- Replace a Cable
- Upgrade Kit Instructions
- Upgrade Kit Packing Your XOOT_Pro
Step C: Taking the Main Arm Out of the Box
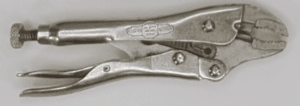
Step D: Assembling the Clamp
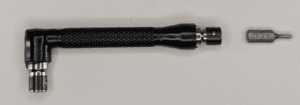
Step E: Attaching the Legs to the Main Arm
Step F: Attaching the Legs to the Clamp
Attach Screen
Cintiq Pro 24, Cintiq Pro 32 and Cintiq 27 QHD
Cintiq Pro 27, MT11 and MT12 Kits
Step G.1: Prep Foam to Hold Screen For Attaching
Step G.2: Attach a Wacom Cintiq Pro 24 to the XOOT_Pro Arm
Goto Next Step: Step H: Stowing Cables and Attaching Covers
Step G.2: Attach a Wacom Cintiq Pro 32 to the XOOT_Pro Arm
Goto Next Step: Step H: Stowing Cables and Attaching Covers
Step G.2: Attach a Wacom Cintiq 27 QHD to the XOOT_Pro Arm
Goto Next Step: Step H: Stowing Cables and Attaching Covers
Step L: Attach a Screen to the MT11 Kit of the XOOT_Pro Arm
The MT11 Kit is our generic Vesa Kit for screens 24″ and smaller
The MT12 Kit is our generic Vesa kit for screens 24″ and larger.
There are several supplemental videos to show special instructions customized for individual screen types.
List of Supplemental Videos:
Goto Next Step: Step H: Stowing Cables and Attaching Covers
(Supplemental) XP-Pen Artist Pro 24 (Gen2) 4K
Goto Next Step: Step H: Stowing Cables and Attaching Covers
(Supplemental) Wacom Cintiq 24 (2025)
Goto Next Step: Step I.2 Test the Quick test of the Brakes System
Step L: Attach a Wacom Cintiq Pro 27 to the XOOT_Pro Arm
Goto Next Step: Step H: Stowing Cables and Attaching Covers
Step L: Attach a XPpen Artist Pro 27 (gen2)
Goto Next Step: Step H: Stowing Cables and Attaching Covers
Step L: Attach a Dell Canvas 27 to the XOOT_Pro Arm
Step H: Stowing Cables and Attaching Covers
Step I.1: Attaching the Touch Strips to your Screen
If your unit came with touch strips where the headphones jacks both come out on the same side:
Here is a document on how to swap the the orientation of the connectors. Change-Touch-Connector-Orientation.pdf
Step I.2: A Quick Test of the XOOT_Pro Brake System
If your braking system is not working correctly, follow the troubleshooting steps in the document: XOOT_Pro-Brake-System-Troubleshooting.pdf
If you need additional support send mail to: support@xoot.pro
Step J: Adjusting the Rotation Friction
Step K: Attaching the Folding Feet to Screen (Optional)
Step M: Attaching Pre-Stress Pads to an MT11Kit (Optional)
Step N: Attaching Weights to MT11 Kit (Optional)
Installing Spacers to change Screen Height
Fixing a Screen Stuck At the Wrong Angle
Troubleshooting arm making a popping noise
Repack a XOOT_Pro (how everything goes back in the box)
Install a New Cable
Replace a Cable
Upgrade Kit Instructions
Upgrade Kits have the parts to change what screen attaches to a XOOT_Pro arm.
This is not a simple process, please review the instruction video before ordering an Upgrade Kit.
Additional Tools Required:
There was a manufacturing mistake that made 4 screws difficult to remove. To aid in the removal of the screws, it’s recommended that you have:
- a 2mm hex driver and wrench to turn it
- A vice grip pliers or other strong pliers
Timeline of Upgrade Kit Installation Videos
0:00 | Start |
0:36 | Show Cutaway View Inside the Arm |
1:22 | Open The Upgrade Kit Box |
3:06 | Show Parts and Tools |
6:30 | Remove Cables |
8:07 | Separate XOOT Arm from Base |
9:13 | Remove Bearing Caps |
9:51 | Remove Top Bearings |
11:29 | Remove Cable Guide |
12:26 | Remove Chains from Sprockets |
13:19 | Remove Elastic Bands from Sheath |
14:12 | Cut Cable Zip Tie |
15:03 | Remove Bottom Bearings |
16:54 | Remove Spring Keeper |
17:47 | Separate Arm from Base |
18:38 | Remove Spring |
19:53 | Remove Chain Arms |
21:10 | *Corrected Way to Remove Shoulder Screws |
23:43 | Clean Dust Catchers |
24:43 | Cut Cable Tag |
25:05 | Replace Cables |
26:18 | Install Chain Arms |
31:35 | Install Spring |
33:40 | Mate the XOOT Arm and the Base |
37:35 | Install the Spring Keeper |
38:57 | Install Bottom Bearings |
42:53 | Set up Cable Guide |
44:23 | Mate Mounting Plate to arm |
44:48 | Install Elastic Bands in Sheath |
47:02 | Install Chains onto Sprockets |
48:27 | Install Cable Guide |
48:58 | Remove Mounting Plate (only CP27, MT11, MT12) |
50:37 | Adjust Cable Length |
53:47 | Install Top Bearings |
56:02 | Install Bearing Caps |
56:45 | Mate XOOT Arm with Base |
1:00:38 | Attach Clamp to Desk |
1:00:50 | Final Adjust Cable Lengths |
1:05:01 | Zip Tie Cables in Arm |
1:08:20 | Zip Tie on the Cable Tag |
1:09:36 | Install Cables in Anti-Topple Arms |
1:12:00 | End |
Upgrade Kit Packing Your XOOT_Pro
- How to pack up your XOOT_Pro arm and return it to have an upgrade kit installed.
Overview:
- Buy an Upgrade Kit with the “Ship It To Us” option. (We will also email you a link to these instructions.)
- Remove the XOOT Arm from its base.
- Requires a 4mm Allen Wrench (This was included with the original XOOT_Pro Kit)

3a. Do you have the original packaging?
- Only pack the upper arm in your XOOT box, (keep the other parts with you to lower the shipping weight).
- The box dimensions are: (LxWxH) (in 26.6″x11.8″x11.2″) (cm 68x30x29)
- Weight should be around:
- 20 lbs (9kg) – with no mounting plate
- 23 lbs (10.5 kg) – with a mounting plate
3b. You don’t have Original Packaging,
Pack your arm in a box.
- The example video use materials:
17 in. L x 11 in. W x 11 in. D Heavy-Duty Small Moving Box
12 in. x 20 ft. Heavy Duty Bubble Cushion
- If the mounting plate is to large to fit in the box, you may remove the Mounting Plate (you can recycle the old mounting plate).

- Tools required for removing the mounting plate:
- 3mm Allen Wrench
- 8mm Spanner Wrench
- Tools required for removing the mounting plate:
4. Box the unit and get it ready for shipping.
Ship To:
Attention: XOOT Upgrades
XOOT Inc.
12311 SE 23rd St.
Bellevue, WA 98005